출처 : https://developer.apple.com/tutorials/app-dev-training/using-stacks-to-arrange-views
Using stacks to arrange views | Apple Developer Documentation
Create, modify, and combine views to compose your app’s user interface using the SwiftUI declarative syntax. You’ll start building Scrumdinger, an app that manages meetings, by arranging groups of views to create the meeting timer screen. As you progre
developer.apple.com
안녕하세요. 리액트해본 스위프트 입문자입니다.
현 시점 기준으로 이슈들을 거의 처리했기 때문에 오랜 만에 다시 swift 공부를 시작합니다.
알게된 것 위주로 기록하고 있어서 역시나 불친절합니다.
1. 프로젝트 생성

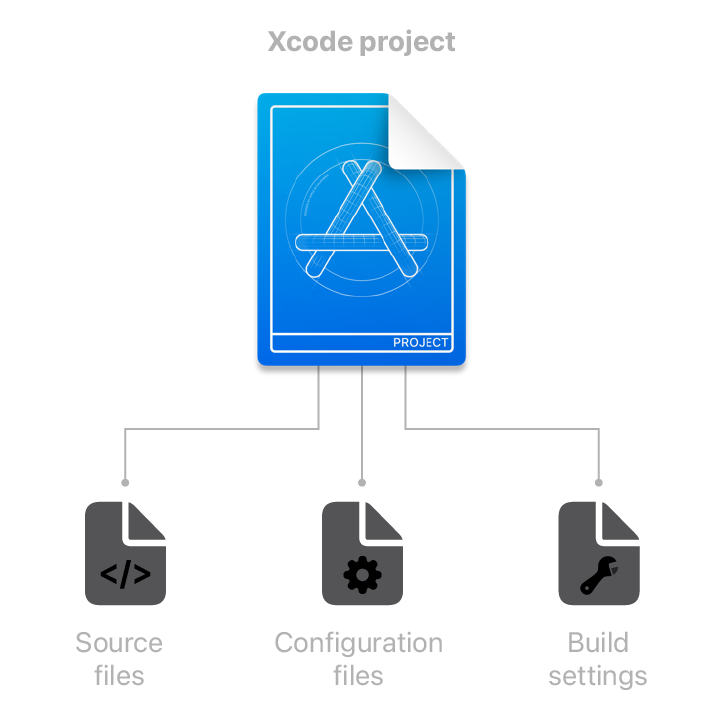
Xcode Project는 소스 파일 + config 파일 + 빌드 파일로 되어있다는 설명
2. @메인 코드
import SwiftUI

@main
struct ScrumdingerApp: App {
    var body: some Scene {
        WindowGroup {
            MeetingView()
        }
    }
}
3. 본격적인 UI 코드 작성
1) PreviewProvider 선언
struct MeetingView_Previews: PreviewProvider {
    static var previews: some View {
        MeetingView()
    }
}
- View 프로토컬을 준수함.
- React 개념으로 보면, MeetingView()은 render return(<body>) 에 해당함.
2) 스택(Stack)을 이용한 배열
struct MeetingView: View {
    var body: some View {
        VStack {
        }
        .padding()
    }
}
- VStack : React 개념으로 하면 <View/> 인데, 그게 vertical한 특징이 있음.
- HStack : <View/> 개념으로 동일하고, horizontal한 특징이 있음.
- .padding() : React에서는 뷰 라인을 기준으로 바깥으로 padding을 주는데, *스유(swiftUI)에서는 뷰 라인 기준으로 안쪽으로 주는 것 같음.

- ProgressView : 프로그레스바 (기본적인 UI를 제공해주는 것 같음)
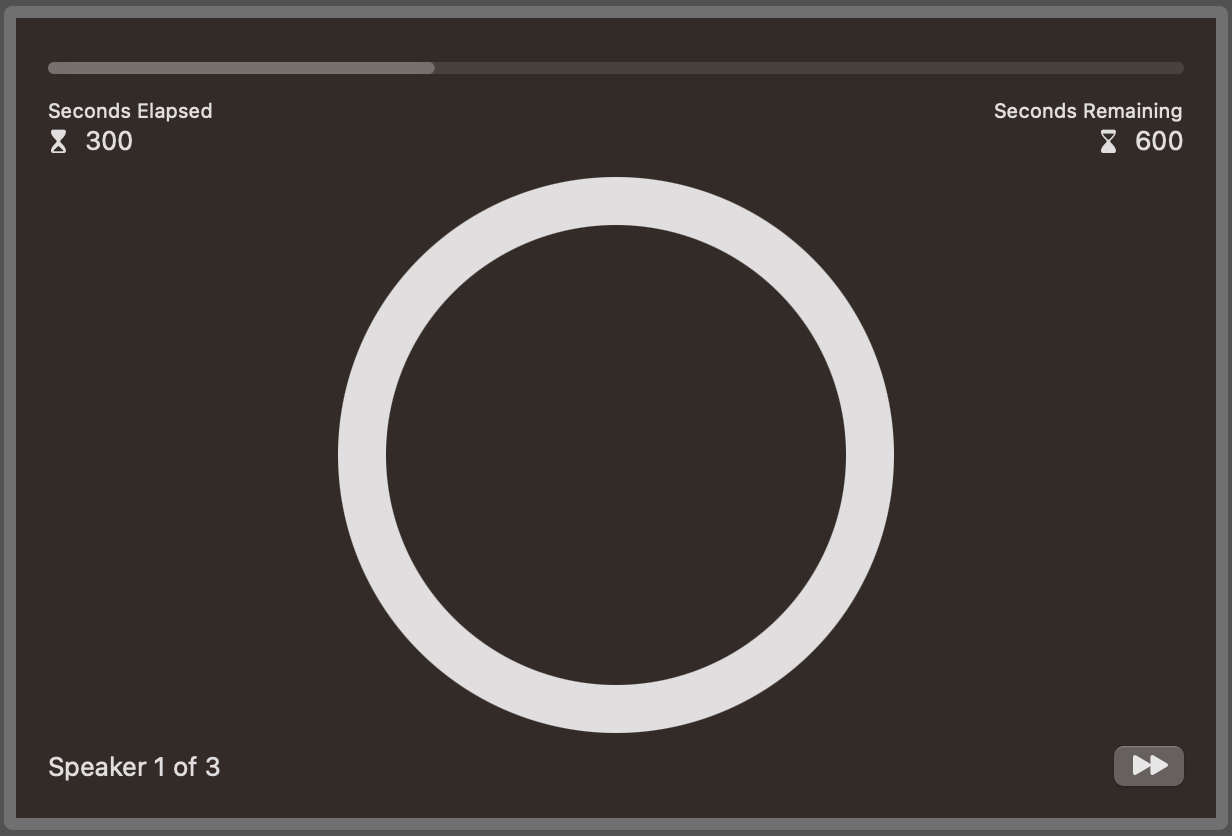
ProgressView(value: 5, total: 15): value와 total로 꽤나 직관적이다.

: HStack 사용의 예시. 하나의 뷰 안에 수평적으로 뷰가 존재함.
            HStack {
                VStack(alignment: .leading) {
                    Text("Seconds Elapsed")
                        .font(.caption)
                    Label("300", systemImage: "hourglass.tophalf.fill")
                }
                Spacer()
                VStack(alignment: .trailing) {
                    Text("Seconds Remaining")
                        .font(.caption)
                    Label("600", systemImage: "hourglass.bottomhalf.fill")
                }
            }
            .accessibilityElement(children: .ignore)
            .accessibilityLabel("Time remaining")
            .accessibilityValue("10 minutes")
- alignment : 정렬 .leading은 왼쪽 정렬, .trailing은 오른쪽 정렬로 스택의 괄호 안에 적어줌.
- .font : .caption 은 글자의 크기를 줄인다.
- Label() : 글자가 포함된 이미지 아이콘 뷰 같음. systemImage는 기본 제공 이미지
- Spacer() : 스택과 스택 사이의 공간을 만들어줌. (between each Stack to use available space from the containing parent view)
- accessibilityElement(children:) : params 기본 값은 .ignore (이 문서에서 accessibilityElement 관련 설명이 부족함) // todo

Circle().strokeBorder(lineWidth: 24)- Circle() : 원을 그림. .strokeBorder 로 border UI 변경 가능함. (lineWidth은 border의 두께 변경)

                HStack {
                    Text("Speaker 1 of 3")
                    Spacer()
                    Button(action: {}) {
                        Image(systemName: "forward.fill")
                    }.accessibilityLabel("Next speaker")
                }
- Button() : action {} 은 onPressEvent와 같음. 버튼 안에 이미지 추가 가능함.

전체 코드
struct MeetingView: View {
    var body: some View {
        VStack {
            ProgressView(value: 5, total: 15)
            HStack {
                VStack(alignment: .leading) {
                    Text("Seconds Elapsed")
                        .font(.caption)
                    Label("300", systemImage: "hourglass.tophalf.fill")
                }
                Spacer()
                VStack(alignment: .trailing) {
                    Text("Seconds Remaining")
                        .font(.caption)
                    Label("600", systemImage: "hourglass.bottomhalf.fill")
                }
            }
            .accessibilityElement(children: .ignore)
            .accessibilityLabel("Time remaining")
            .accessibilityValue("10 minutes")
            Circle()
                .strokeBorder(lineWidth: 24)
            HStack {
                Text("Speaker 1 of 3")
                Spacer()
                Button(action: {}) {
                    Image(systemName: "forward.fill")
                }
                .accessibilityLabel("Next speaker")
            }
        }
        .padding()
    }
}
이걸로 Stack 배열 개념 완료?
'iOS | SwiftUI' 카테고리의 다른 글
| [상태 관리] Swift - observable, View life cycle (0) | 2023.10.24 |
|---|---|
| [디자인 패턴] MVVM 요약 정리 with Swift (0) | 2023.10.23 |
| [TIL] 스위프트 공식 튜토리얼 따라하기(2) - 카드 뷰(card view) 만들기 (1) | 2023.10.16 |
| [TIL] A Swift Tour 대충이지만 읽기 완료! (0) | 2023.09.13 |
| [TIL] 정말로 처음 시작하는 Swift (0) | 2023.09.12 |
